 By Maya Reed, Editor
Reviewed & updated September 2026 · Researched, AI-assisted & human-reviewed
Educational information only — not medical advice. Learn more
The glute bridge looks almost too simple to matter — lie down, lift your hips, lower back down. But most people either skip it entirely or rush through it without ever actually feeling their glutes work, which defeats the point. Done with the right form, it's one of the most effective exercises for building glute strength and fixing the "glutes that won't fire" problem so many desk-bound lifters deal with.
This is general fitness information, not medical advice. Talk to a doctor or physical therapist before starting a new exercise routine, especially if you have lower back pain or an existing injury.
 What you’ll find insideCurated by Maya · 7 min read
What is a glute bridge?
The glute bridge is a floor exercise where you lie on your back with knees bent and feet flat, then lift your hips toward the ceiling by squeezing your glutes, pause at the top, and lower back down with control. It's a hip extension movement, meaning it trains the same basic action as a squat or deadlift's lockout — just isolated, with your upper back anchored on the floor instead of standing under load.
Because it removes balance and lower-body coordination from the equation, the glute bridge is one of the clearest ways to learn what an actual glute contraction feels like, which is why trainers use it as both a warm-up activation drill and a standalone strength exercise.
Why the glute bridge matters
Sitting for long stretches of the day tends to leave the glutes underused and the hip flexors tight, which can show up as a flat, weak-feeling backside and lower back or knee discomfort during squats and lunges. The glute bridge directly counters this by teaching your body to extend the hips using the glutes instead of letting the lower back or hamstrings take over.
It's also one of the few exercises that lets you isolate the glutes almost completely, which makes it valuable both as a standalone strength builder and as a diagnostic tool — if you can't feel your glutes working during a bridge, that's a sign they need more attention before you load up bigger lifts like squats and deadlifts.
Step-by-step: how to do a glute bridge
- Lie on your back on a mat, knees bent, feet flat on the floor about hip-width apart, heels roughly 6-12 inches from your glutes.
- Rest your arms flat on the floor beside you, palms down, for stability.
- Brace your core gently and flatten your lower back slightly into the floor before you begin moving.
- Push through your heels and squeeze your glutes to lift your hips off the floor, driving upward until your body forms a straight line from shoulders to knees.
- Pause at the top for one to two seconds, squeezing the glutes as hard as you can without your lower back arching excessively.
- Lower back down with control, stopping just before your hips touch the floor, then repeat.
Aim for 12-15 controlled reps, 2-3 sets, 2-3 times per week — or use it as a 10-15 rep activation drill before lower-body workouts.
Common mistakes
Pushing through the toes instead of the heels. Driving through your toes shifts the work toward your quads and calves. Keep weight in your heels so the glutes and hamstrings do the lifting.
Overarching the lower back at the top. Going too high and letting the lower back arch excessively takes tension off the glutes and puts it on the spine. Stop the movement once your body forms a straight line — don't try to lift higher than that.
Letting the knees cave inward. Knees drifting toward each other as you lift is a sign the glutes (specifically the muscles that control hip rotation) aren't fully engaged. Keep knees tracking in line with your feet throughout.
Rushing the rep. Fast, bouncy bridges rely on momentum instead of muscle. Slow down, especially on the way down, to keep tension on the glutes the entire time.
Feet placed too far from the body. Heels too far out reduces the range of motion and shifts emphasis toward the hamstrings. Keep heels close enough that your shins are close to vertical at the top of the movement.
Glute bridge variations
Single-leg glute bridge. Extending one leg straight and bridging on the other dramatically increases the difficulty and challenges each side independently, useful for catching left-right strength imbalances.
Weighted glute bridge (hip thrust). Placing a dumbbell or barbell across your hips adds resistance once bodyweight reps feel easy — this is essentially the floor version of the hip thrust.
Marching glute bridge. Holding the top position and alternately lifting one foot off the floor at a time adds a stability and core challenge on top of the standard bridge.
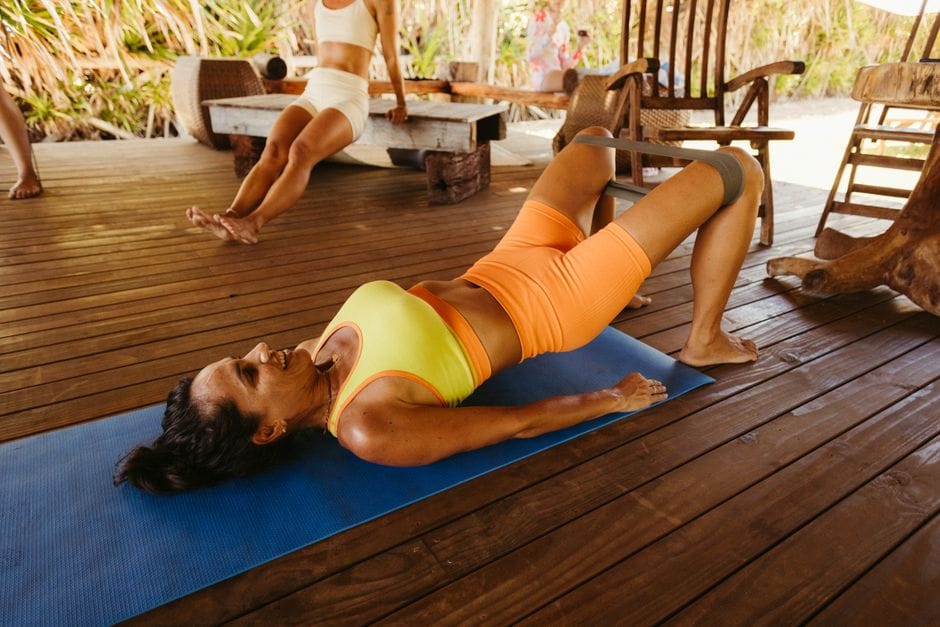
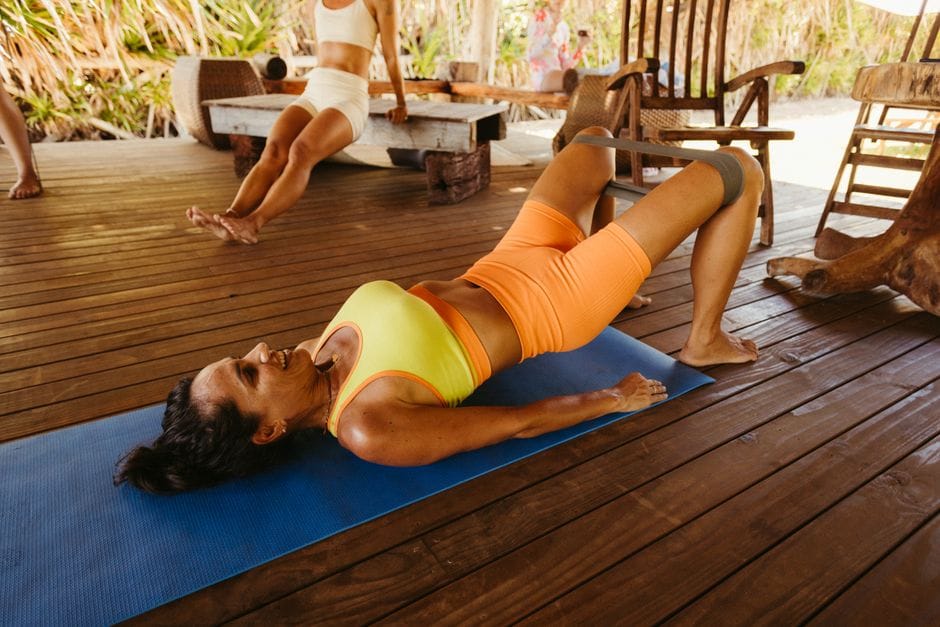
Banded glute bridge. Looping a resistance band just above the knees and pressing outward against it during the bridge adds extra glute activation, particularly for the side glute muscles.
Where the glute bridge fits in your workout
The glute bridge works well in two roles:
- As a warm-up activation drill, done for 10-15 reps before squats, lunges, or deadlifts to "wake up" the glutes and improve how well they engage during heavier lifts.
- As a standalone strength exercise, done for 2-3 sets of 12-15 reps, especially useful for beginners who aren't ready for a loaded hip thrust or who need to build a mind-muscle connection with their glutes first.
Two to three sessions a week is enough to see real strength and activation improvements without overtraining a muscle group that also gets worked indirectly during squats and deadlifts.
The takeaway
The glute bridge earns its spot in a routine because it isolates a muscle group that's easy to under-use and hard to feel working during bigger compound lifts. The payoff comes almost entirely from control — pushing through the heels, squeezing hard at the top, and avoiding an overarched lower back turns a simple floor movement into a genuinely effective glute builder. Master the bodyweight version first, then progress to single-leg or weighted variations once the basic pattern feels solid.
Frequently asked questions
How is a glute bridge different from a hip thrust?
They train the same movement pattern, but a hip thrust is performed with your upper back elevated on a bench, which allows a greater range of motion and more load. The floor glute bridge is a good starting point before progressing to a loaded hip thrust.
How many glute bridges should I do?
12-15 controlled reps for 2-3 sets, 2-3 times per week, is a solid target for building strength. As a warm-up drill, 10-15 reps before your main lower-body work is enough to activate the glutes.
Why can't I feel my glutes working during a bridge?
This usually means the quads, hamstrings, or lower back are compensating. Focus on pushing through your heels, squeezing the glutes hard at the top, and stopping before your lower back overarches — slowing the tempo down often helps you find the right muscles.
Can beginners do glute bridges?
Yes — the bodyweight glute bridge is one of the most beginner-friendly glute exercises there is, since it removes balance and coordination challenges. It's often recommended as a starting point before squats, lunges, or hip thrusts.
Read next
Further reading & trusted sources
A common mistake to skip
Most people top out the movement too high and let the ribcage flare and lower back arch, which actually reduces glute tension right at the point they think they’re squeezing hardest. Stopping at a true straight line from shoulders to knees — rather than pushing for extra height — is what makes the top-of-rep squeeze land in the glutes instead of the spine.
Maya’s editorial obsession is the gap between fitness hype and what the evidence actually shows — she’d rather hand you one boring habit that works than ten exciting ones that don’t. She builds FitNourish’s guides from mainstream, well-established sources (the CDC, the NHS, Mayo Clinic, and peer-reviewed research) and has a human review every one for accuracy before it publishes. She and the team are dedicated fitness enthusiasts and researchers, not doctors, so everything here is general information rather than medical advice. AI tools help with the research and drafting; the fact-checking and judgement are human.