 By Maya Reed, Editor
Reviewed & updated September 2026 · Researched, AI-assisted & human-reviewed
Educational information only — not medical advice. Learn more
The bicep curl looks like the simplest exercise in the gym, which is exactly why so many people do it wrong for years without noticing. Swinging the weight, flaring the elbows, and using momentum instead of muscle all quietly steal the results you're working for.
This article is for general fitness education and isn't a substitute for personalized guidance from a certified trainer or your doctor, especially if you have an elbow, wrist, or shoulder injury.
 Jump to a sectionCurated by Maya · 7 min read
Why the bicep curl matters
The biceps brachii is the muscle you're targeting, and it crosses both the elbow and shoulder joint, which is part of why curls can go wrong in more than one way at once. Strong, well-trained biceps help with everything from carrying groceries to pulling exercises like rows and pull-ups, where the biceps assist the back muscles. Curls also tend to be one of the first exercises people learn, so bad habits picked up early often stick around for years.
Step-by-step: standing dumbbell bicep curl
- Stand tall with a dumbbell in each hand, arms fully extended at your sides, palms facing forward. Feet shoulder-width apart, knees slightly soft, core braced.
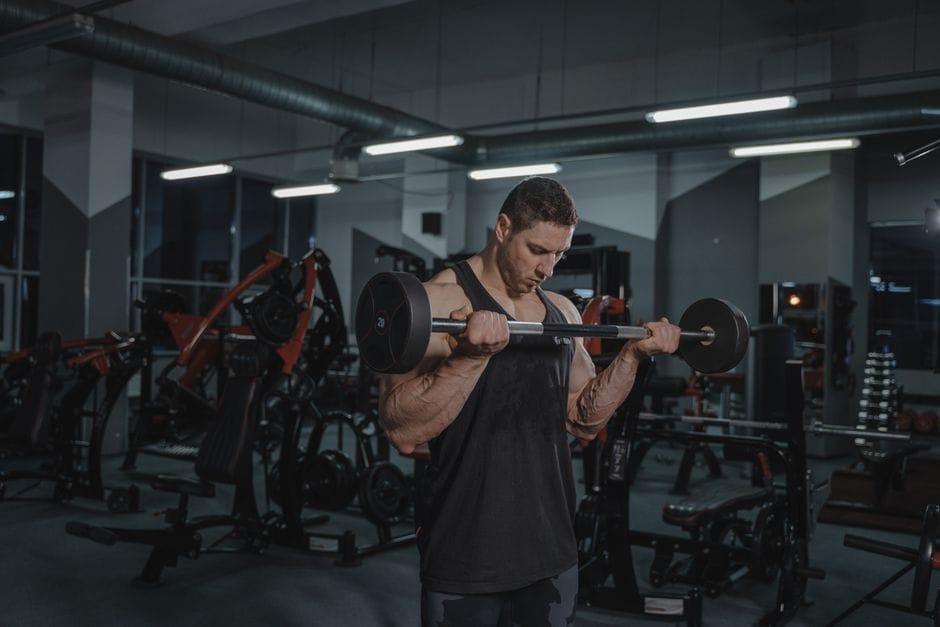
- Pin your elbows to your sides. This is the single most important setup cue — your elbows should stay close to your ribs for the entire movement, not drift forward or backward.
- Curl the weight up by bending only at the elbow. Keep your upper arm still, like it's taped to your torso. The forearm does the traveling.
- Squeeze at the top for a one-second pause when your forearm is roughly vertical or slightly past it. Avoid over-curling past a natural range, which just adds momentum without adding muscle work.
- Lower with control, taking about twice as long on the way down as the way up. The lowering (eccentric) phase is where a lot of the muscle-building signal happens, so don't just let gravity do the work.
- Reset fully at the bottom — a soft elbow lockout, not a locked-out hyperextension — before starting the next rep.
The most common bicep curl mistakes
- Swinging the torso. If you're rocking backward to "help" the weight up, it's too heavy. Drop the load and rebuild from strict form.
- Flaring the elbows forward. This shifts tension onto the front delts and shortens the range of motion the biceps actually get to work through.
- Curling with the wrists instead of the elbows. Keep the wrist neutral and let the elbow do the bending; a flicking wrist just adds strain to a smaller joint.
- Only doing half reps. Partial curls at the top of the range feel strong because leverage is in your favor there — but skipping the bottom stretch limits muscle growth.
- Racing through reps. Fast, bouncy curls rely on momentum. Slowing the tempo, especially the lowering phase, makes a lighter weight feel plenty challenging.
Bicep curl variations worth knowing
- Hammer curl — palms face each other throughout the movement instead of facing forward. This shifts some emphasis to the brachialis and forearm, and is often easier on sensitive wrists or elbows.
- Concentration curl — seated, elbow braced against the inside of your thigh. Removes almost all momentum and torso assistance, making it a good form check.
- Incline dumbbell curl — lying back on an incline bench lets your arm hang slightly behind your torso, stretching the biceps more at the bottom of the rep.
- Cable curl — a cable machine keeps constant tension through the whole range, including the very top and bottom, where a dumbbell curl can lose tension.
- Resistance band curl — a solid at-home substitute when you don't have dumbbells; band tension increases as you curl, so it naturally gets harder right where the biceps are strongest.
How many sets and reps
For general strength and size, 3 sets of 8–12 reps per arm (or per set, if curling both arms together) two to three times a week is a reasonable starting point. Choose a weight where the last 2 reps of each set feel genuinely difficult with good form — if you can easily do 15+ reps without slowing down, it's time to size up.
Programming curls into a workout
Bicep curls are an isolation exercise, meaning they work best as an accessory movement rather than the centerpiece of a session. A common approach is to place curls after your main compound lifts (like rows, pull-ups, or presses) since the biceps are already partially fatigued from those pulling movements. Pairing curls with a triceps exercise in the same session (an "arms day" superset) is a popular and effective structure for anyone specifically chasing arm size.
Signs your form still needs work
If your elbows are sore rather than your biceps, or if you feel the exercise more in your shoulders or lower back than your upper arms, that's a sign the weight is too heavy for your current form. Filming yourself from the side is one of the most useful (and free) form checks — you'll usually spot elbow drift or torso swing immediately on video that you can't feel in the moment.
The takeaway
A proper bicep curl comes down to a few unglamorous basics: elbows pinned, controlled tempo, full range of motion, and a weight you can actually manage without swinging. Master that standing dumbbell version first, then layer in hammer curls, incline curls, or cables once strict form feels automatic. Consistency with good form will build more strength and size over months than any amount of ego lifting with sloppy reps.
Frequently asked questions
Should I curl both arms at the same time or alternate?
Either works. Curling both arms together is slightly more time-efficient, while alternating can make it easier to focus on strict form for each rep since you're not managing two moving weights at once.
Why do my biceps feel tight but not very sore after curls?
Biceps are a smaller muscle group and often don't get as sore as larger muscles like the legs or back, especially once you're a few weeks into consistent training. Reduced soreness over time is normal and doesn't mean the exercise stopped working — track strength progress instead of relying on soreness as a signal.
Is it bad to feel curls in my shoulders?
A little shoulder involvement is normal since the biceps cross the shoulder joint, but if the front of your shoulder is doing more work than your upper arm, your elbows have likely drifted forward. Reset your elbow position at your sides and reduce the weight if needed.
How long until I see results from bicep curls?
Most people notice a strength increase (being able to curl more weight or do more reps) within 4–6 weeks of consistent training. Visible size changes typically take longer — often 8–12 weeks or more — and depend on overall training volume, nutrition, and genetics.
Read next
Further reading & trusted sources
What to actually expect
Sore forearms or a strained-feeling front shoulder after curls is a more reliable sign of elbow drift than anything visible in the mirror mid-set, since the elbows sliding forward even a few inches quietly shifts load off the biceps before it’s noticeable to the lifter. Slowing only the lowering half of the rep adds more muscle-building stimulus than slowing the whole rep evenly, which is why coaches cue a controlled negative specifically rather than just ‘go slower’ in general.
Maya’s editorial obsession is the gap between fitness hype and what the evidence actually shows — she’d rather hand you one boring habit that works than ten exciting ones that don’t. She builds FitNourish’s guides from mainstream, well-established sources (the CDC, the NHS, Mayo Clinic, and peer-reviewed research) and has a human review every one for accuracy before it publishes. She and the team are dedicated fitness enthusiasts and researchers, not doctors, so everything here is general information rather than medical advice. AI tools help with the research and drafting; the fact-checking and judgement are human.